Using PostgreSQL with Payara Server
Product News
PostgreSQL is a fully SQL-Compliant relational database you can use with Payara Server and with no commercial licensing requirements it is well suited for production environments. This blog will show you how to set up a new PostgreSQL installation on Ubuntu and connect to it from Payara Server.
To install PostgreSQL on Ubuntu based distributions:
sudo apt-get install postgres postgres-client postgresql-contrib
Download the JDBC driver from https://jdbc.postgresql.org/download.html and then add it to Payara Server by running:
asadmin> add-library /path/to/download/jdbcdriver.jar`
Login to Postgres with the default account by running the commands:
sudo -i -u postgres
psql
You now need to set a password for the PostgreSQL user on the database. Do so with:
password postgres
and then enter the new password when prompted.
For full functionality of PostgreSQL, server instrumentation must be enabled, you do this by running the command in Postgres
CREATE EXTENSION adminpack;
You will notice there are two pools already. These are the default server pools and are not recommended for production usage. A new connection pool is needed for PostgreSQL, which you can create by clicking the New button.
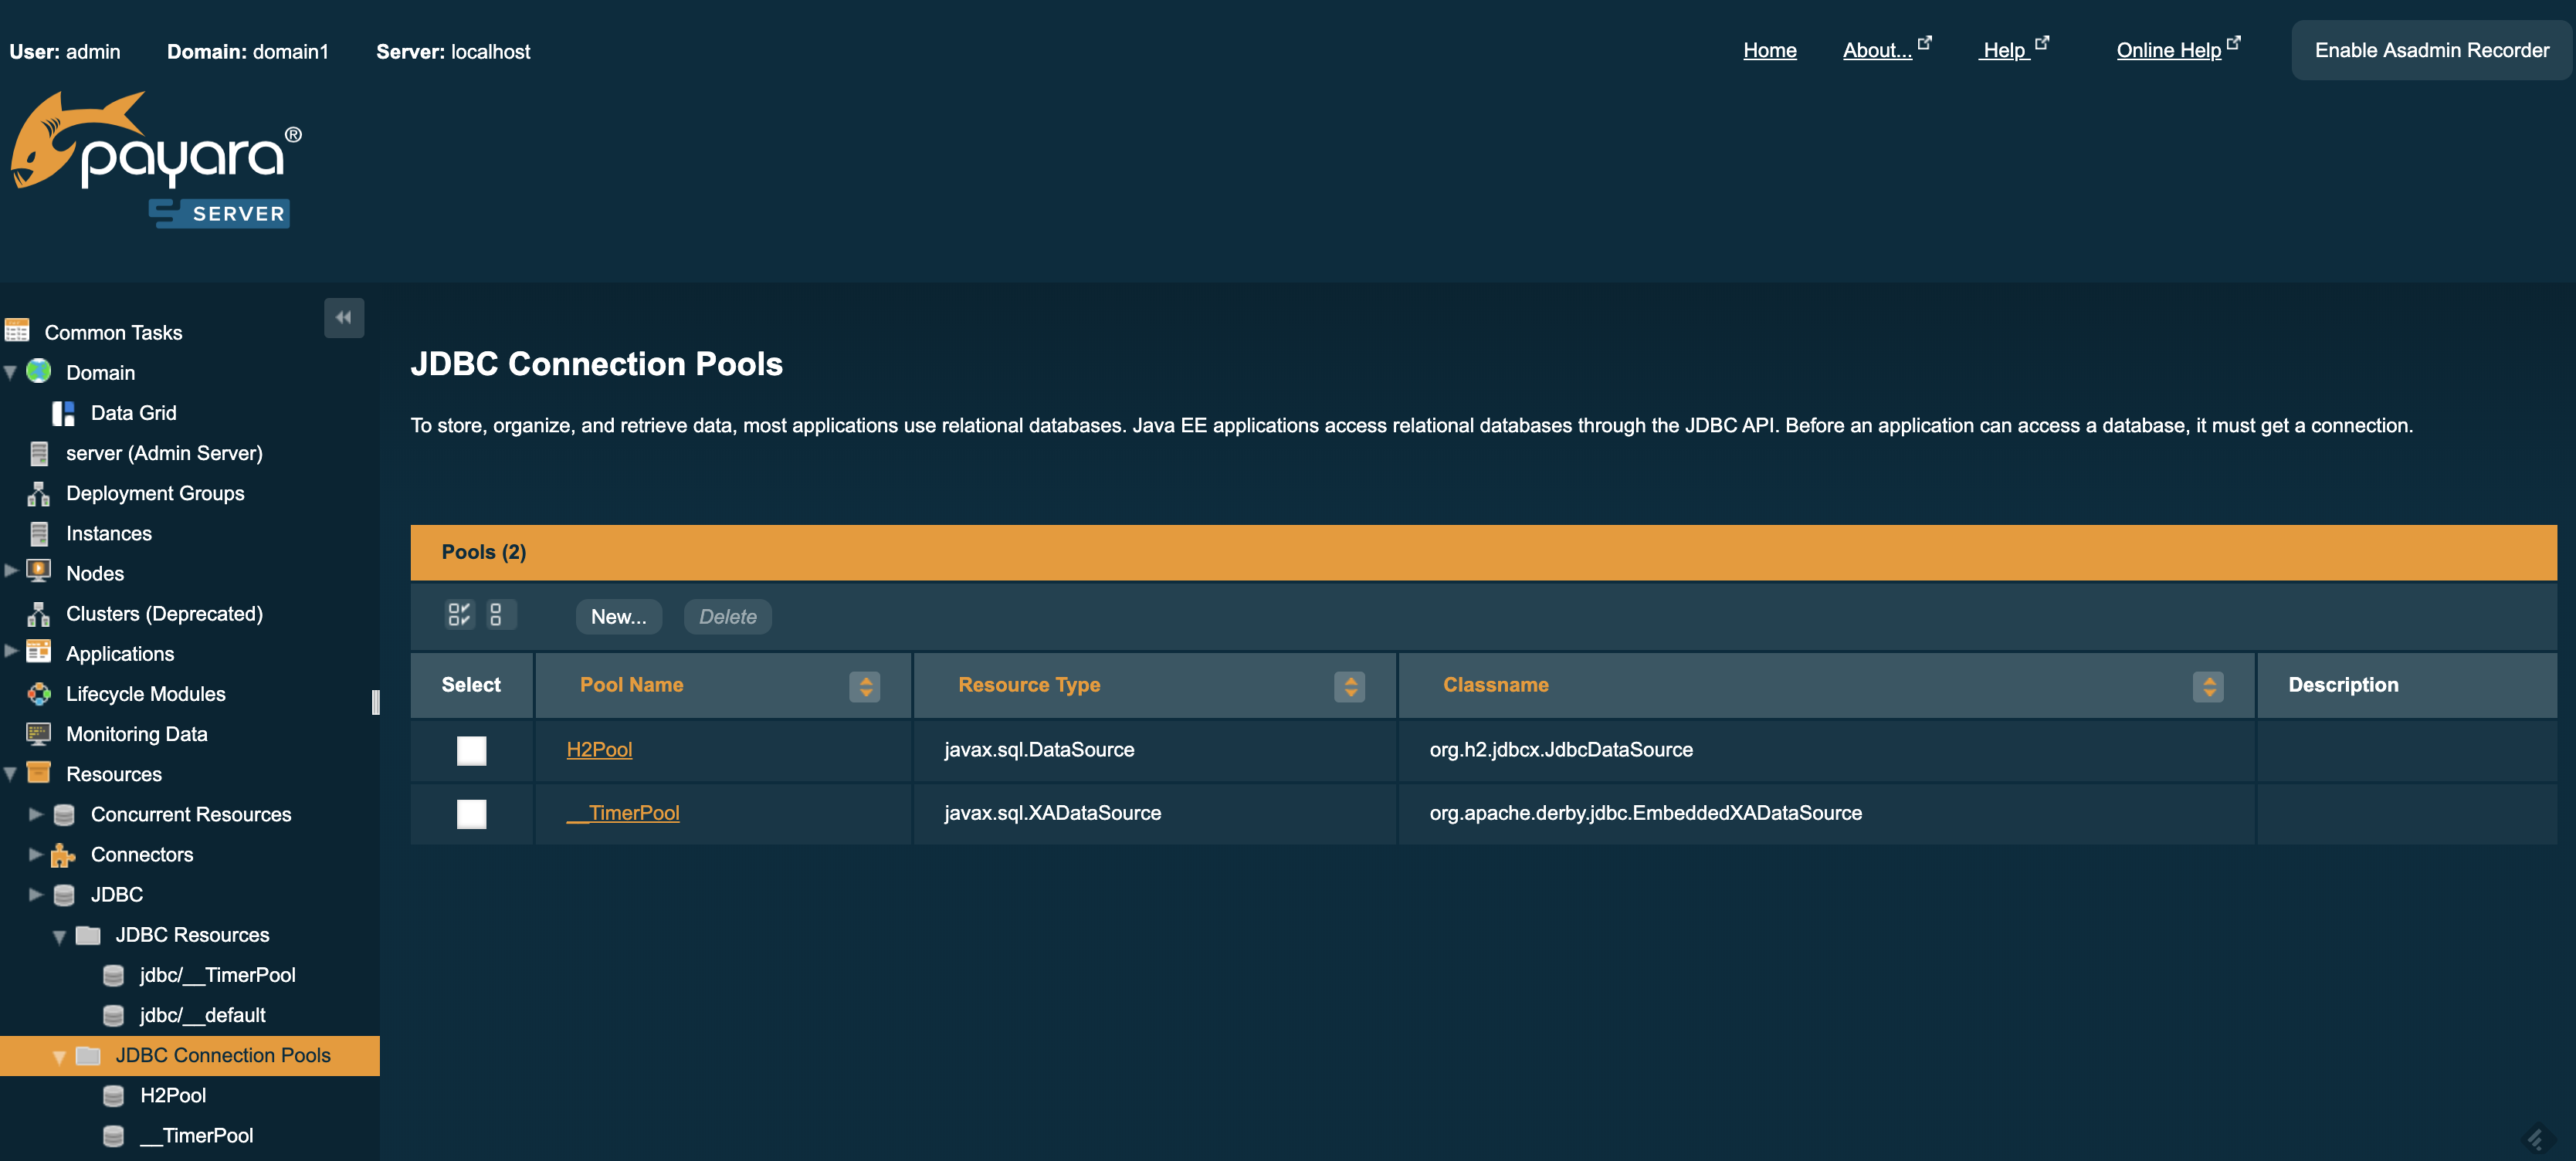
Now to create a connection pool. For this tutorial the admin console will be used, but this can be done using asadmin commands or web.xml. The pool name is how the connection pool is to be referred to within Payara Server, for this tutorial I will call it postgresqlpool. Set the resource type to javax.sql.DataSource and the database driver vendor to PostgreSQL. Then click Next.

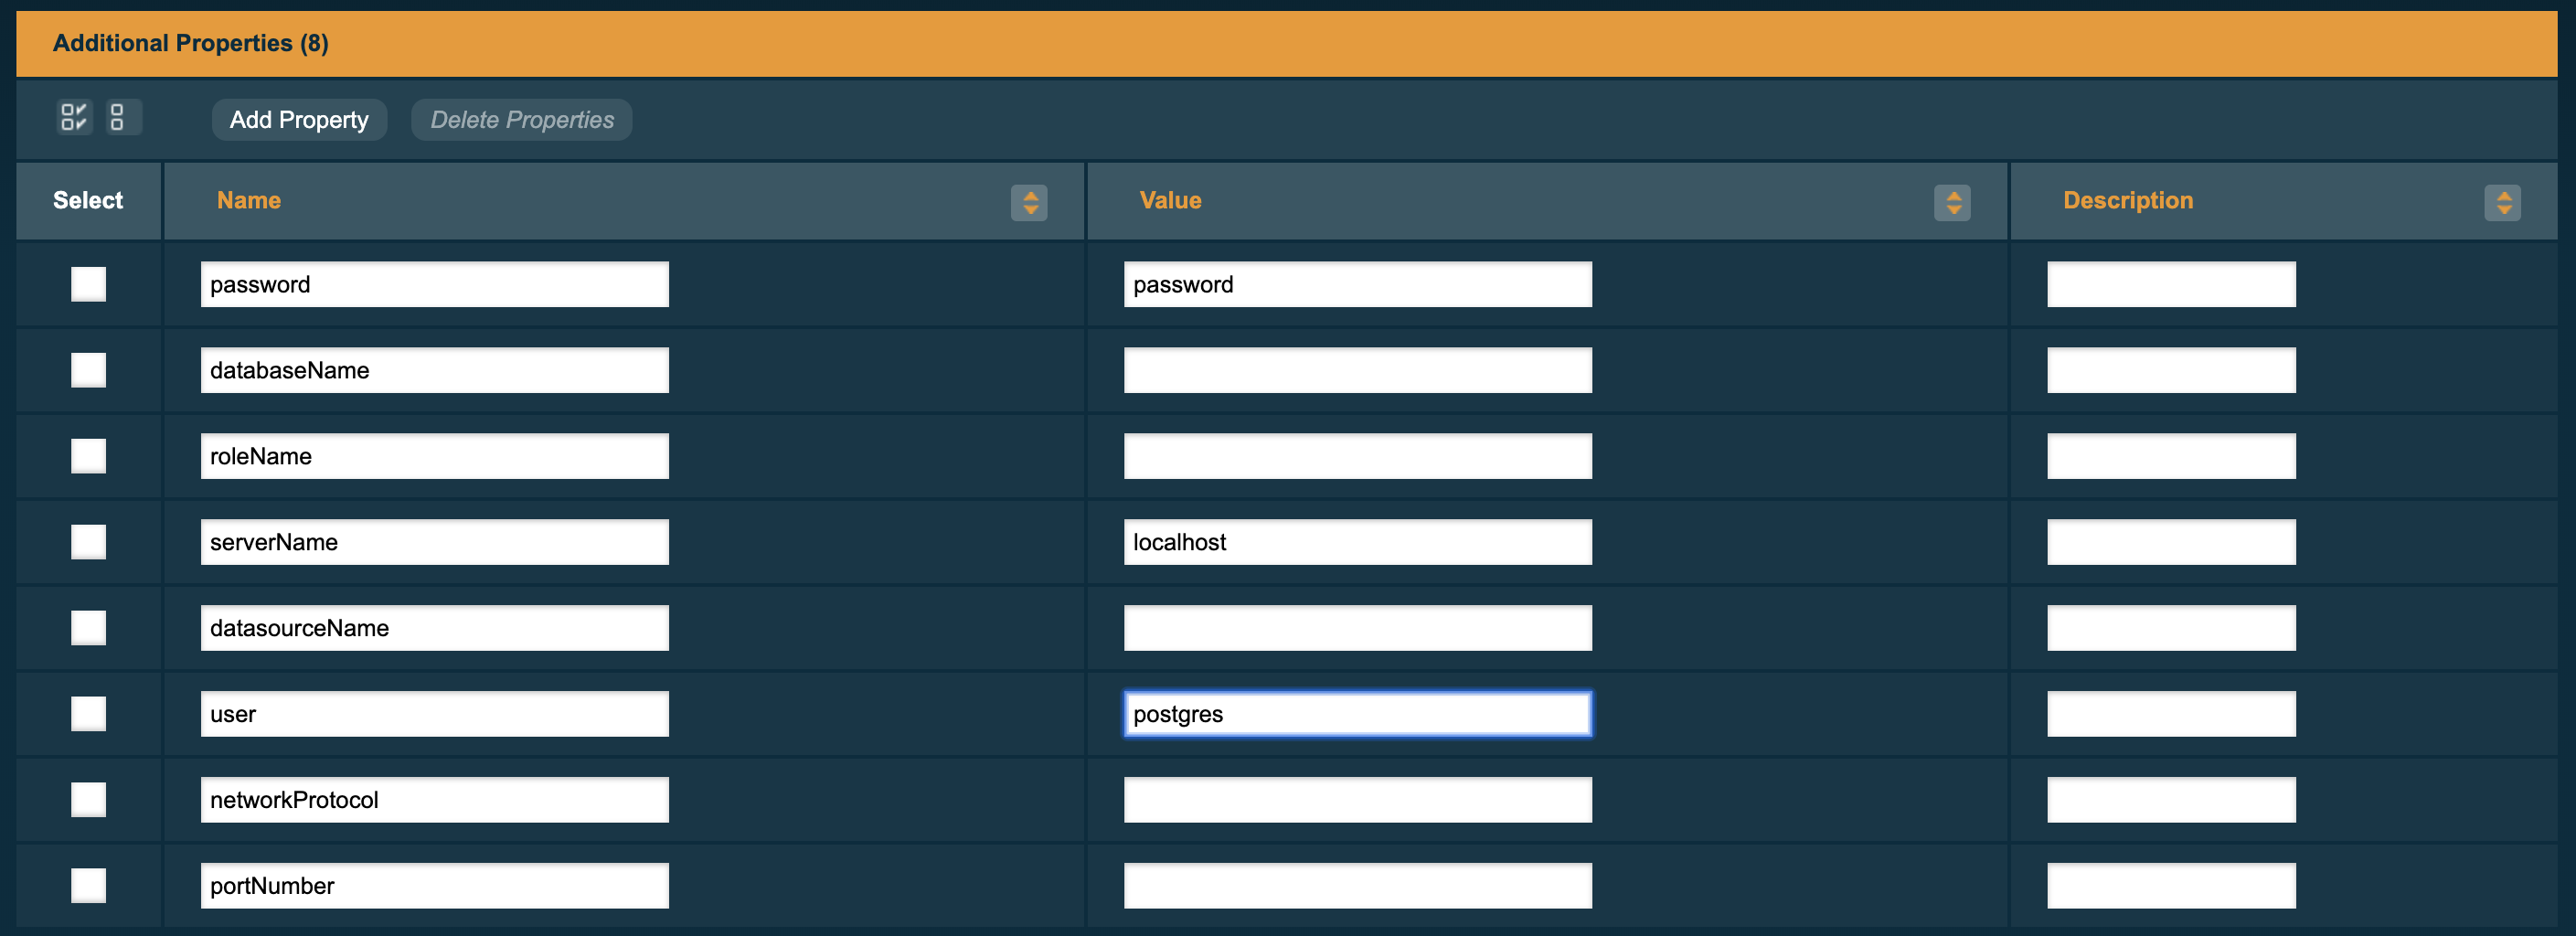
On the next page, scroll down to the bottom where there is the additional properties table. There you must set the following properties in order to be able to connect:
You can leave the rest of the fields blank for now.
You can test the connection by clicking the ping button once the pool has been created. For more information on connection pools see the blog post here.

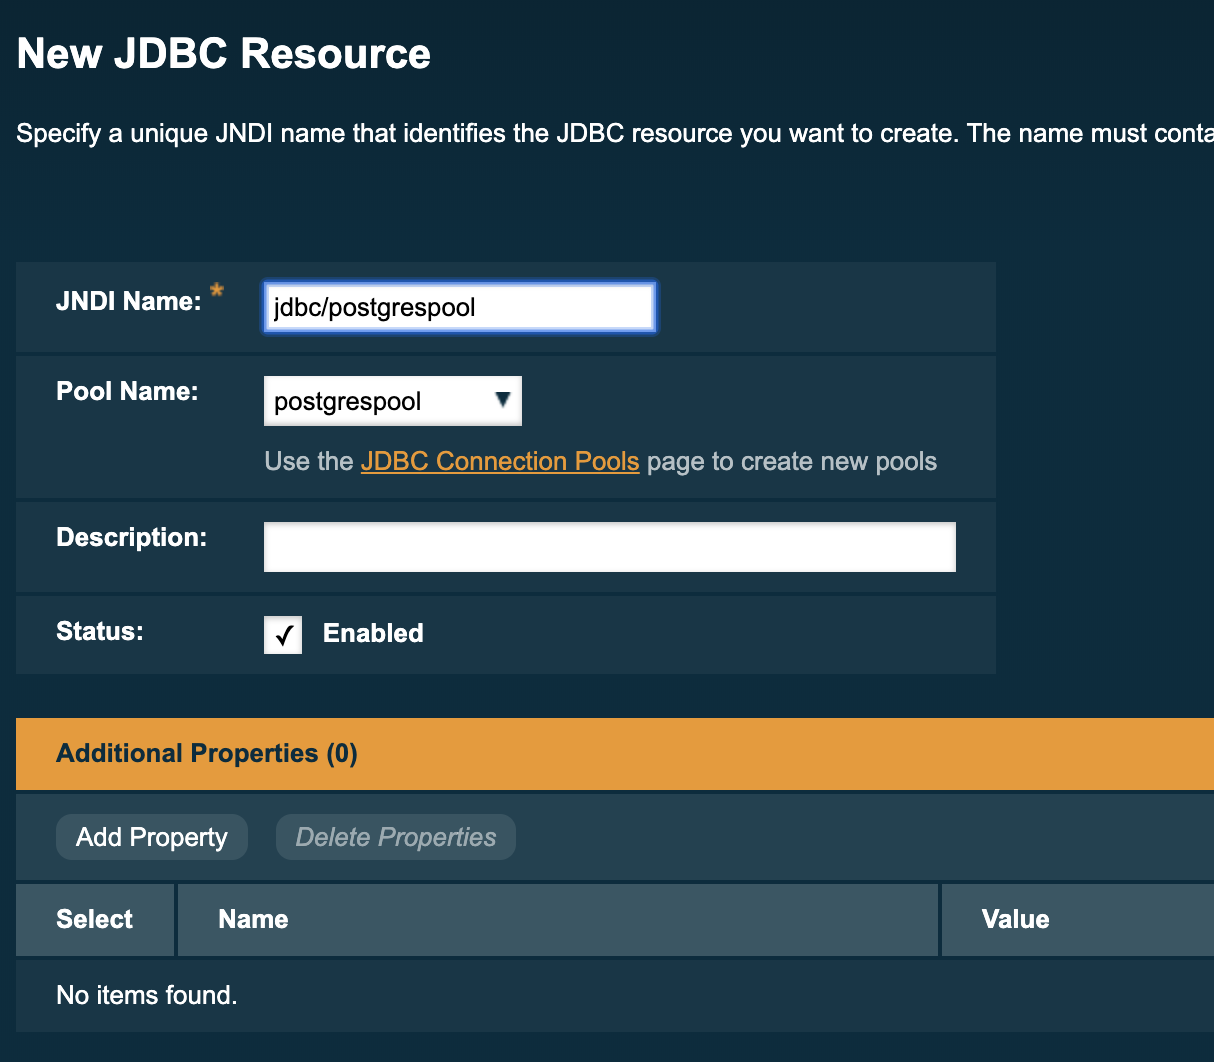
Then go to Resources → JDBC → JDBC Resources and click on New.
Enter the JNDI name that you wish to use within your applications and set the pool name to be that of the pool set up in the previous step.
Now, you can inject a reference to a datasource for the PostgreSQL database inside a managed component like this:
@Resource(lookup = "jdbc/postgrespool")
DataSource ds;
Note that you can only use resources in a web container or a managed bean (i.e. CDI beans, EJBs etc.).
{{cta(‘4c7626f5-1e53-418e-90c8-add6e4af19c9′,’justifycenter’)}}
Share:

 4 minutes
The March 2026 release brings important platform modernization, stability improvements, and comprehensive bug fixes across the Azul Payara Platform […]
5 minutes
The February 2026 release of the Payara Platform is centered on a major initiative to streamline the platform. This involves removing […]
3 minutes
As we begin 2026, we’re pleased to announce new releases across all Payara Platform editions this January: Payara Platform […]
Can you say a little more about why “for full functionality server instrumentation must be enabled” with adminpack?
This refers to PostgreSQL advanced features, for more information see the PostgreSQL documentation at https://www.postgresql.org/docs/10/static/index.html.
Oh, so it’s not for a Payara feature?
No, its for PostgreSQL and is not a Payara feature. See the documentation link I posted before.
adminpack offers capabilities for reading and writing files to and from the server. The most notable use case is PgAdmin. I’d suspect it doesn’t add any valuable function in the context of running a Payara connected to a PostgreSQL database server.
Hello, in case the payara and the postgres are on different hosts, what should be put in the ServerName field? the name of the postgres host or the IP of the postgres host
Either will work. The ServerName can be the IP address, or a name that can resolved either by the hosts file or a DNS lookup.